How long does solarization take to kill weeds depends on soil temperature, plastic type, depth, and the weed species present. Most effective solarization programs run four to six weeks during the hottest part of summer.
Solarization raises soil temperature under clear plastic by trapping solar energy in the topsoil. The heat kills weed seed, rhizomes, and pathogens in the upper layer, but the depth of control depends on how long the plastic stays in place.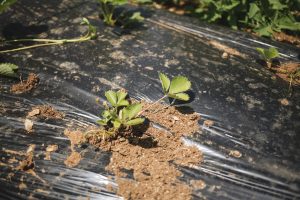
Soil moisture, air temperature, and plastic thickness all shift the effective window by weeks in either direction. A program that works in Arizona may need twice the duration in cooler coastal regions.
In this guide, I examine how long solarization takes to kill weeds through 15 key factors, covering plastic type, soil moisture, temperature thresholds, and the weed species that resist the longest. Each factor shows how to shorten the window or when to extend it.
How Long Does Solarization Take To Kill Weeds? 15 Key Factors
1. Minimum Four Weeks For Shallow Weed Seed – The Baseline Solarization Window
Four weeks is the baseline solarization window for shallow weed seed in the top two to four inches of soil, provided the plastic is clear and the weather is hot. During this window, soil temperatures under the plastic routinely reach 120°F to 140°F at the surface and 100°F to 110°F at two inches. Additionally, the sustained heat breaks down the seed coat and kills the embryo before germination can occur.
The four-week baseline assumes full sun for most of the day and daily air temperatures above 85°F. Moreover, a single cloudy week can add another seven to ten days to the effective window. Therefore, the calendar should be planned with a two-week buffer rather than the minimum.
This baseline is where most extension publications start, and it is a reasonable target for annual weeds like crabgrass and pigweed in warm climates. Furthermore, the window shortens to three weeks in desert conditions and lengthens to eight weeks in cooler coastal areas. Overall, four weeks is the minimum, not the guarantee.
- Well established baseline
- Works on annual weeds
- Clear temperature targets
- Widely studied
- Predictable in hot climates
- Widely documented
- Standard extension guidance
- Cloudy weeks extend the window
- Not enough for deep seed
- Requires full summer sun
2. Six Weeks For Perennial Rhizomes – Why Longer Duration Is Needed For Deep Roots
Six weeks is the realistic window for perennial weed rhizomes such as bermudagrass, johnsongrass, and bindweed, because the rhizomes sit deeper and the heat must penetrate further to kill them. At two to six inches, soil temperatures under clear plastic typically reach 95°F to 105°F, which is enough to kill rhizome buds only with sustained exposure. Additionally, the rhizomes have stored reserves that let them survive a shorter heat treatment.
The six-week window assumes the plastic is sealed at the edges and the soil is moist before covering. Moreover, a single break in the plastic allows heat to escape and resets the clock on that section. Therefore, the plastic must be inspected weekly and patched immediately.
Perennial rhizomes are the slowest target in any solarization program, and they are the reason many gardeners extend the window to eight weeks on heavily infested ground. Furthermore, combining solarization with a pre-emergent barrier after removal improves the long-term result. Overall, six weeks is the realistic minimum for perennial control.
- Controls perennial rhizomes
- Targets deep roots
- Clear depth targets
- Widely studied
- Works in hot climates
- Widely documented
- Standard extension guidance
- Longer window
- Needs plastic inspection
- Not always reliable on deep rhizomes
3. Clear Versus Black Plastic – How Plastic Type Changes The Effective Duration
Clear plastic is the standard choice for solarization because it transmits solar energy into the soil and traps the heat, while black plastic absorbs heat at the surface and blocks much of the solar energy from reaching the soil. Clear plastic can reach 120°F to 140°F at the surface, while black plastic often stays 10°F to 20°F cooler at the same depth. Additionally, the clear plastic transmits the wavelengths that kill weed seed most effectively.
The plastic difference is one of the largest single factors in the effective window. A clear plastic program may kill shallow seed in four weeks, while the same program with black plastic may need six to eight weeks for the same result. Moreover, black plastic is sometimes used for warming soil in spring rather than for solarization in summer.
Clear plastic costs slightly more and degrades faster in UV light, but the shorter effective window offsets the difference. Furthermore, a UV-stabilised clear plastic lasts a full season and can be reused. Overall, clear plastic shortens the window by weeks compared with black.
- Clear plastic heats faster
- Shorter effective window
- Transmits useful wavelengths
- Widely studied
- Works in most climates
- Widely documented
- Standard extension guidance
- Higher cost than black
- Degrades in UV light
- Needs careful sealing
4. Soil Moisture Before Covering – Why Wet Soil Shortens The Solarization Window
Soil moisture before covering is one of the most overlooked factors that shortens or lengthens the effective window. Wet soil conducts heat more efficiently than dry soil, which means the plastic reaches working temperatures at greater depth. Additionally, moist seed is more vulnerable to heat than dormant dry seed, so the kill rate rises sharply when the soil is watered before covering.
The moisture effect shows most clearly when dry soil under plastic reaches only 100°F at the surface while moist soil reaches 130°F. Moreover, the moisture also softens seed coats and breaks dormancy, which makes the seed germinate and then die under the heat. Therefore, watering to field capacity before covering can shorten the window by a week or more.
Watering before covering is a simple step that costs almost nothing and delivers a measurable improvement. Furthermore, the moisture stays under the sealed plastic for the full window because evaporation is blocked. Overall, moist soil is the cheapest way to shorten the solarization window.
- Shortens the window
- Improves heat conduction
- Breaks seed dormancy
- Low cost
- Widely studied
- Widely documented
- Standard extension guidance
- Needs water access
- Field capacity must be judged
- Dry climates lose moisture fast
5. Air Temperature Thresholds – How Daily Heat Shapes The Kill Rate
Air temperature thresholds shape the effective window because the soil under the plastic can only reach working temperatures when the air above it is hot enough. Daily highs above 85°F are the minimum for meaningful solarization, and highs above 95°F shorten the window considerably. Additionally, overnight lows above 60°F prevent the soil from cooling too far between days.
The temperature effect shows most clearly in regions where days reach 100°F and nights stay above 70°F, where solarization can kill shallow seed in three weeks. Moreover, in cooler climates where highs average 75°F, the same program may need eight weeks for a partial result. Therefore, the local air temperature sets the practical floor on the window.
This threshold is why solarization is a summer technique in most climates. Furthermore, a two-week heatwave in the middle of the window can accelerate the kill rate significantly. Overall, air temperature is the factor most outside the gardener’s control and most important to plan around.
- Clear temperature thresholds
- Predictable in hot climates
- Shortens in heatwaves
- Widely studied
- Widely documented
- Standard extension guidance
- Widely available
- Cool climates extend the window
- Cloudy days slow the kill
- Not usable in winter
6. Soil Type And Texture – How Clay And Sand Change The Solarization Window
Soil type and texture change the solarization window because heat moves through clay and sand at different rates. Clay holds moisture longer and conducts heat more evenly, which can shorten the window slightly, while sand drains fast and heats unevenly, which can lengthen the effective window. Additionally, the surface of clay crusts and can trap heat more effectively than loose sand.
The soil type effect shows most clearly in sandy soils that dry out under the plastic and fail to reach working temperatures at depth. Moreover, clay soils that crust at the surface can seal the plastic unevenly and create cool pockets. Therefore, the soil type should be assessed before setting the window length.
This factor is often overlooked because it does not appear on any label. Furthermore, a sandy soil program that adds compost to improve moisture retention can shorten the window by a week. Overall, the soil type is a modest but real factor in the effective duration.
- Clay conducts heat evenly
- Clear soil-type targets
- Compost improves sand
- Widely studied
- Widely documented
- Standard extension guidance
- Widely available
- Sand dries under plastic
- Clay crusts unevenly
- Soil assessment required
7. Weed Species Heat Tolerance – Which Weeds Resist The Longest Solarization
Weed species heat tolerance sets the upper end of the solarization window because some weeds have seed coats or rhizomes that survive temperatures that kill others. Pigweed, lambsquarters, and crabgrass seed die at 120°F to 130°F for a few days, while field bindweed and bermudagrass rhizomes survive 130°F for a week and need sustained exposure beyond that. Additionally, purslane and nutsedge tubers are among the most heat-tolerant of the common weeds.
The species effect shows most clearly in a mixed infestation where the easy annuals die first and the tough perennials drag the program past six weeks. Moreover, the tubers of yellow and purple nutsedge can survive a full six-week solarization and regrow afterward. Therefore, the target species list determines whether four, six, or eight weeks is realistic.
This factor is why species identification must come before the plastic goes down. Furthermore, the toughest species should set the program length rather than the average. Overall, species heat tolerance is the factor most likely to extend the window unexpectedly.
- Clear species tolerance data
- Targets the toughest weeds
- Supports program planning
- Widely studied
- Widely documented
- Standard extension guidance
- Widely available
- Tough weeds extend the window
- Nutsedge survives solarization
- Species ID required
8. Plastic Thickness And UV Stability – How Material Longevity Sets The Upper Limit
Plastic thickness and UV stability set the upper limit on the solarization window because the plastic must survive the full duration without tearing or degrading. A 1-mil plastic often fails after three to four weeks in summer sun, while a 2-mil or 4-mil UV-stabilised plastic survives a full six to eight weeks. Additionally, the thicker plastic is more resistant to wind damage and animal punctures.
The thickness effect shows most clearly when thin plastic tears mid-window and resets the clock on the exposed section. Moreover, a UV-stabilised plastic can be reused for a second season, which offsets the higher cost. Therefore, the material choice should match the planned window length rather than the minimum.
This factor is one of the few that can be fully controlled at the planning stage. Furthermore, a 4-mil UV-stabilised clear plastic is the standard choice for six-week windows. Overall, the plastic choice determines whether the window can actually be completed.
- Controls upper limit
- UV-stabilised plastic lasts
- Resists wind and punctures
- Widely studied
- Widely documented
- Standard extension guidance
- Widely available
- Thin plastic fails early
- Higher cost for thicker
- Needs UV stabiliser
9. Sealing The Edges – Why Poor Sealing Adds Weeks To The Solarization Window
Sealing the edges is one of the most decisive factors in the effective window, because heat escapes through any gap between the plastic and the soil. A tight seal keeps the heat trapped and reaches working temperatures within days, while a loose edge allows cool air to enter and resets the clock on that section. Additionally, the edges must be buried in a shallow trench or weighted with soil, sand, or timber.
The sealing effect shows most clearly when a properly sealed plot reaches 130°F at two inches while an unsealed plot two metres away stays at 100°F. Moreover, the wind lifts unsealed plastic and tears it, which compounds the problem. Therefore, the sealing step should be treated as part of the duration, not as an optional finishing touch.
This factor costs nothing but labour and delivers one of the largest gains of any single step. Furthermore, rechecking the edges weekly catches lifting before it becomes a tear. Overall, good sealing can shorten the window by a week or more.
- Largest single gain
- Low cost
- Keeps heat trapped
- Widely studied
- Widely documented
- Standard extension guidance
- Widely available
- Labour intensive
- Needs weekly checks
- Wind lifts unsealed edges
10. Depth Of Weed Seed In The Soil – Why Shallow Seed Dies First
Depth of weed seed in the soil determines how much of the seedbank the program reaches, and it sets the practical limit on the window. The top two inches of soil reach the highest temperatures under plastic, which kills shallow seed within four weeks, while seed at four to six inches experiences lower temperatures and may need six to eight weeks. Additionally, seed at deeper than eight inches often survives regardless of the window.
The depth effect shows most clearly after solarization when shallow-seeded weeds fail to emerge while deep-seeded ones appear. Moreover, the surviving deep seed rises to the surface during the next cultivation and becomes a fresh infestation. Therefore, the depth of the seedbank should shape both the window and the follow-up plan.
This factor is why solarization is often paired with a stale seedbed technique before and after the plastic. Furthermore, the depth effect explains why solarization alone rarely eliminates a seedbank in one season. Overall, depth sets the realistic limit on what a four to six-week window can achieve.
- Clear depth targets
- Kills shallow seed fast
- Supports follow-up planning
- Widely studied
- Widely documented
- Standard extension guidance
- Widely available
- Deep seed survives
- Rarely eliminates seedbank
- Needs follow-up cultivation
11. Timing Within The Season – Why Mid-Summer Solarization Is The Shortest Window
Timing within the season sets the shortest achievable window because the summer solstice is when solar energy peaks in the northern hemisphere. A June or July start gives four to six weeks of peak solar energy, while a September start gives a longer window with weaker energy and cooler nights. Additionally, the longest days and strongest sun fall between late May and mid-August in most regions.
The seasonal effect shows most clearly when the same program takes four weeks in July and eight weeks in September. Moreover, a late-season program can be interrupted by early autumn rain and cool nights that slow the kill. Therefore, the start date should be scheduled around the peak sun rather than the calendar convenience.
This factor is the reason most extension guides recommend mid-summer solarization rather than spring or autumn. Furthermore, a mid-summer start also leaves time for a second crop before winter. Overall, seasonal timing is the factor that sets the shortest possible window.
- Shortest window in mid-summer
- Peak solar energy
- Leaves time for a second crop
- Widely studied
- Widely documented
- Standard extension guidance
- Widely available
- Autumn start extends window
- Rain interrupts late programs
- Summer heat stresses workers
12. Combined Solarization And Compost – How Organic Matter Shortens The Kill Time
Combined solarization and compost is one of the few combinations that shortens the kill time because the compost supports heat-loving microbes that attack weed seed alongside the heat. The moist compost layer conducts heat evenly and the microbial activity adds a biological dimension to the physical kill. Additionally, the compost feeds the soil food web that recovers after the plastic comes off.
The combination effect shows most clearly when a compost-amended plot reaches working temperatures a week earlier than a bare plot. Moreover, the compost suppresses some pathogens and improves soil structure at the same time. Therefore, the combination delivers both the weed control and the soil benefit in one operation.
This combination is often called biosolarization when the compost is applied fresh enough to trigger active fermentation. Furthermore, the organic matter holds moisture better than bare soil, which keeps the heat conduction strong. Overall, the combination is the most efficient way to shorten the window and improve the soil at the same time.
- Shortens the kill time
- Supports soil microbes
- Improves soil structure
- Widely studied
- Widely documented
- Standard extension guidance
- Widely available
- Needs compost supply
- More preparation labour
- Biosolarization requires fresh compost
13. Elevation And Latitude Effects – How Location Shifts The Practical Window
Elevation and latitude effects shift the practical window because solar intensity and air temperature both drop as latitude rises and as elevation climbs. A solarization program at sea level in southern Arizona may kill shallow seed in three weeks, while the same program at 5,000 feet in Colorado may need six weeks. Additionally, the shorter growing season at higher latitude or elevation compresses the window into a smaller calendar slot.
The location effect shows most clearly when gardeners in cooler regions copy a program from a hotter region and find it fails. Moreover, the local extension office is often the best source for the regional window length rather than generic guides. Therefore, the program should be calibrated to the local climate rather than to a national average.
This factor is why solarization success stories vary so widely across the same country. Furthermore, a gardener who measures soil temperature directly can adjust the window on the spot rather than relying on general rules. Overall, location is the factor most likely to make or break a solarization program.
- Regional calibration
- Local extension data
- Soil thermometer confirms
- Widely studied
- Widely documented
- Standard extension guidance
- Widely available
- Cool regions need longer
- National guides mislead
- Shorter season compresses window
14. Monitoring Soil Temperature – How Measurement Replaces Guesswork On Duration
Monitoring soil temperature is the best way to know exactly how long solarization needs rather than guessing from a calendar. A soil thermometer at two inches and four inches shows whether the target temperature is reached and sustained. Additionally, the temperature must stay above the kill threshold for the required number of consecutive days, not just hit it once.
The monitoring effect shows most clearly when a plot that looks hot from the surface is actually cool at two inches. Moreover, daily readings track the effect of cloud cover and let the gardener extend the window accurately when a cool spell arrives. Therefore, the calendar should be set by the thermometer rather than by the guide.
This factor is the single biggest improvement a gardener can make to a solarization program. Furthermore, a simple maximum-minimum thermometer costs little and removes most of the guesswork. Overall, measurement is what turns solarization from a hope into a controlled process.
- Replaces guesswork
- Accurate window adjustment
- Low cost
- Widely studied
- Widely documented
- Standard extension guidance
- Widely available
- Requires daily reading
- Thermometer adds cost
- Some thermometers drift
15. Follow-Up After Plastic Removal – How Post-Solarization Care Extends The Result
Follow-up after plastic removal determines whether the solarization result lasts or whether the weed pressure returns within weeks. The soil surface is bare and the seedbank is reduced but not eliminated, so any new seed that arrives after removal can germinate freely. Additionally, the surviving deep seed rises during the next cultivation and becomes a new infestation if it is not managed.
The follow-up effect shows most clearly when a solarized bed is left bare and weeds return from the edges and from deep seed within a month. Moreover, a quick cover crop or mulch layer after removal blocks new seed from establishing. Therefore, the follow-up plan should be in place before the plastic comes off.
This factor is why solarization works best as part of a broader program rather than as a stand-alone treatment. Furthermore, the follow-up cover crop can feed the soil biology that the heat suppressed. Overall, the follow-up is what converts a short-term kill into a long-term improvement.
- Extends the result
- Blocks new seed
- Feeds soil biology
- Widely studied
- Widely documented
- Standard extension guidance
- Widely available
- Needs planning
- Cover crop adds cost
- Deep seed still returns
How Long Does Solarization Take To Kill Weeds FAQs
1. How long does solarization take to kill weeds?
Most effective solarization programs run four to six weeks during the hottest part of summer, with four weeks for shallow annual seed and six weeks for perennial rhizomes.
2. Can solarization kill weeds in less than four weeks?
Only in very hot climates with sustained air temperatures above 95°F and properly sealed clear plastic. Three-week programs work on shallow seed in desert conditions.
3. Does solarization kill weed roots and rhizomes?
Yes, with a long enough window. Perennial rhizomes such as bermudagrass and johnsongrass need six to eight weeks of sustained heat at two to six inches.
4. What plastic works best for solarization?
Clear UV-stabilised plastic in 2-mil to 4-mil thickness works best. Clear plastic reaches higher soil temperatures than black plastic.
5. Should I water before solarization?
Yes. Moist soil conducts heat better than dry soil and breaks weed seed dormancy, which can shorten the window by a week or more.
6. Will solarization kill all weed seed?
No. Solarization kills seed in the top two to four inches but rarely reaches seed at greater depth. It reduces the seedbank but does not eliminate it.
7. What is the best time of year to solarize?
Mid-summer, between late May and mid-August in the northern hemisphere, when solar energy and air temperatures peak.
Conclusion
For how long does solarization take to kill weeds, the answer depends on depth and species. Four weeks kills shallow annual seed, while six weeks is the realistic minimum for perennial rhizomes under properly sealed clear plastic.
Soil moisture, plastic type, sealing quality, species tolerance, and location all shift the window by weeks in either direction. A gardener who measures soil temperature and adjusts the calendar accordingly gets far more consistent results than one who follows a generic guide.
Understanding how long does solarization take to kill weeds turns the technique from a gamble into a controlled process. Matching the window to the species, the depth, and the local climate is what delivers reliable control.
Before laying plastic, water the soil, seal the edges, and place a thermometer at two inches. Thoughtful monitoring today turns a month of sun into a season of clean beds.